Installation Setup and User Guide
Step-By-Step Guide for Programming your Thermostat
This guide will fully explain how to move through each option on the installer menu. It is recommended to read through this guide once before installing, because the installer menu will time out after 30 seconds of inactivity.
It will help to have the ThermaLink Instructions opened to page 12 under the Installer/Technician Setup Menu.
Initial Setup and Accessing the Installer Menu
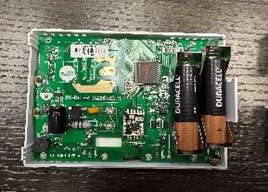
Step 1: Verify that you have power to the thermostat. There are 2 terminals for incoming power on the back of the thermostat, R and C, representing 24V AC power (R) and Common (C). Otherwise, 2 AA batteries should be installed for either the primary power or the backup power even if you have 24V supplied via wire.

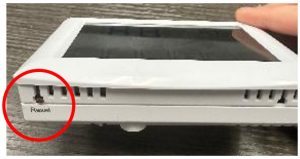
When the thermostat first receives power, it may be necessary to hit the Reset button located underneath and to the left on the thermostat.
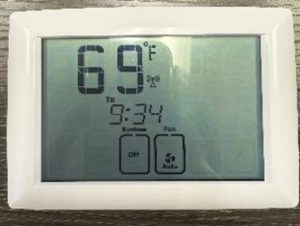
Step 2: You should be at the main screen in the “Off” system seen below. If you are not currently in the “Off” mode, hit the System button until you are in the Off mode. It should look like below.
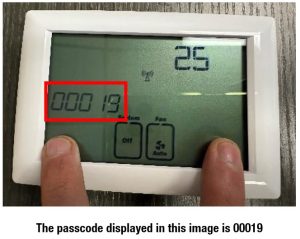
Step 3: Use 2 fingers to touch the bottom left and bottom right of the screen at the same time. There should be no buttons visible where you are pressing on the screen. This is a hidden menu. If done correctly, a 5-digit code should appear on the middle left of the screen. This is your Installer Menu Passcode. This passcode is unique for every thermostat. It will need to be entered every time you want to access the installer menu, so you will want to remember this passcode.
Step 4: Set the system to Cool or Heat mode. It does not matter which of these modes you are in at the moment.
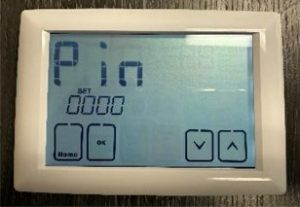
Step 5: Hold down the “Set” button on the bottom left of the screen for 5 seconds. It should now be asking you for that 5-digit pin referenced above. Use the Up/Down key buttons to enter the passcode, and then hit OK.

You are now in the Installer Menu.
Can’t find your answer in our support center? Contact us directly.